The Add/Edit Asset page is the heart of your inventory management. Whether you’re creating a new item or updating an existing one, this is where all the details live. The page is designed to be a comprehensive, single-screen view of everything related to one asset.
Card-Based Layout
The page is organized into a series of “cards,” each dedicated to a specific type of information. This keeps the data organized and easy to find. The main cards include:
- Core Details: For the asset’s name, type, and status.
- Media: For all photos of the asset.
- Assignment: To link the asset to a location, project, client, or user.
- Classification: For identifying details like manufacturer, model, and category.
- And more… for financials, files, notes, and other information.
On mobile, these cards are collapsible to save space. You can use the “Expand All” and “Collapse All” buttons to quickly show or hide all information.
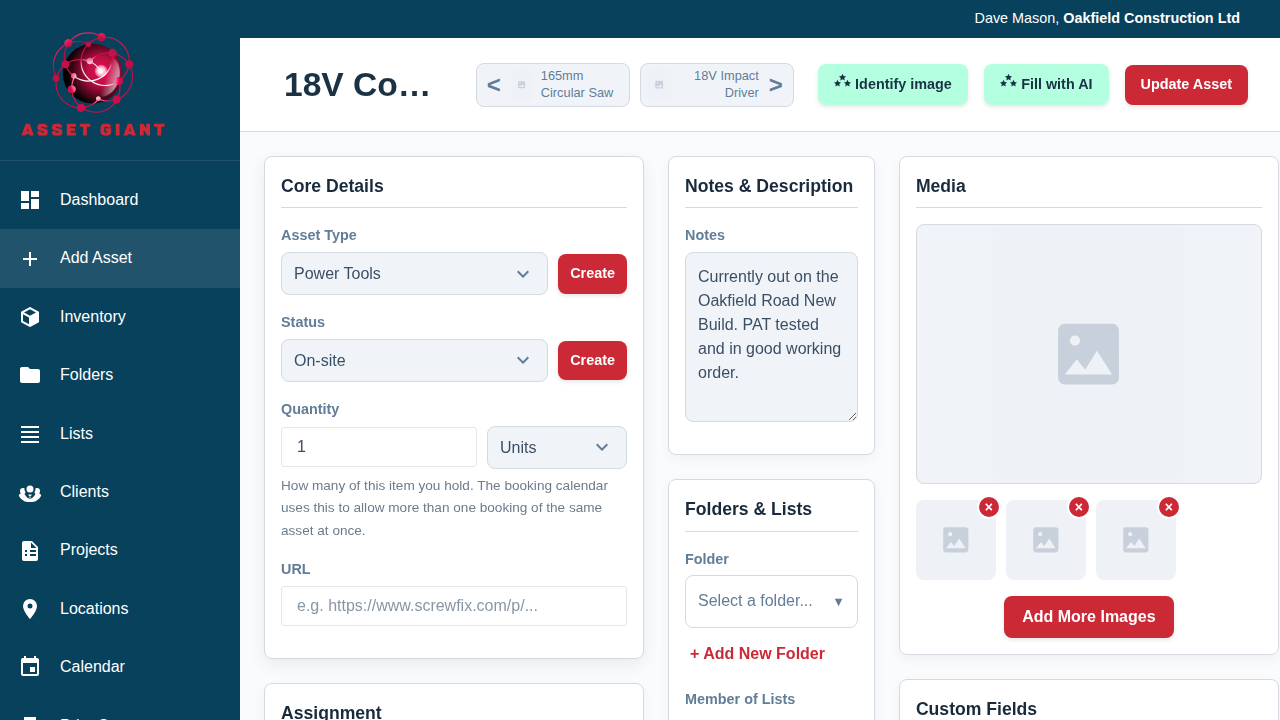
The Header
The header at the top of the page contains the most important information and actions:

- Asset Name: The main title of the page is the asset’s name. You can click on it to edit the name directly. See Editing the Asset Name for more.
- Asset Navigator: When editing an existing asset, “Previous” and “Next” buttons will appear, allowing you to quickly cycle through your inventory without returning to the main list.
- Action Buttons: This is where you’ll find the primary action buttons, such as “Identify Image” and “Save/Update Asset”.
This page serves as your central hub for all asset-related data entry and management.