Whenever you save a new asset, the system automatically generates a unique, sequential ID for it (e.g., TOOL000001). The Asset Types & ID Formatting table in your settings allows you to customize how these IDs are generated for each asset type.
How to Access ID Formatting
- Navigate to Settings from the main menu.
- Click on the “Preferences” tab.
- Find the “Asset Types & ID Formatting” card.
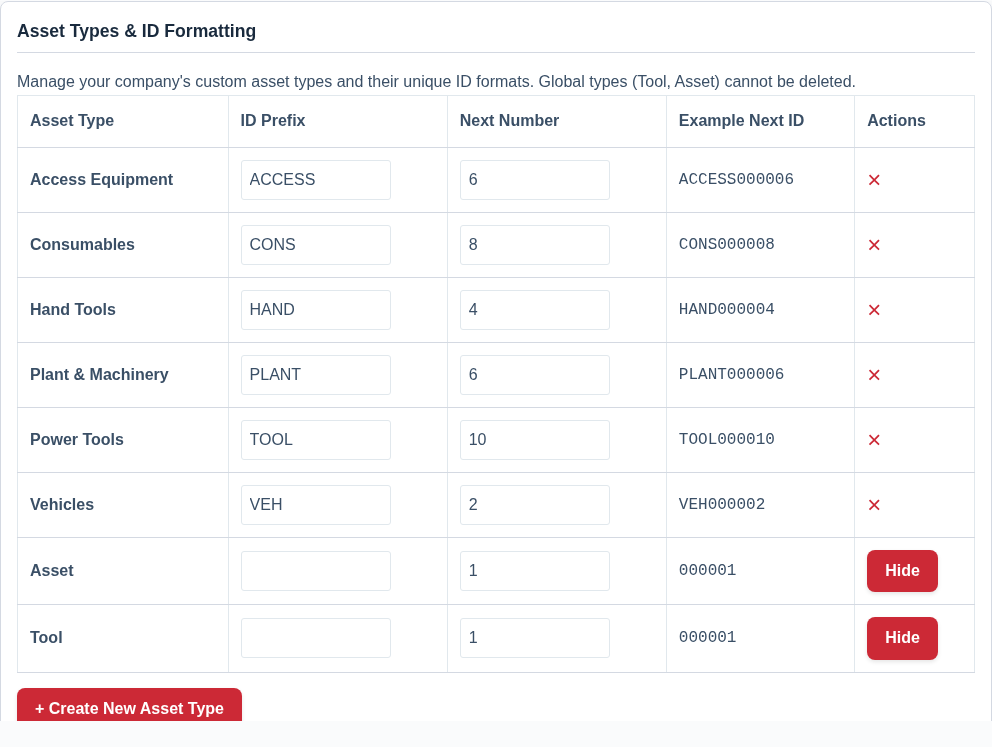
Understanding the Table
Each row in the table represents one of your Managing Asset Types and controls its ID format.
- Asset Type: The name of the asset type this rule applies to.
- ID Prefix: The text that will appear at the beginning of the ID. By default, this is based on the asset type’s name (e.g., “TOOL”), but you can change it to whatever you like (e.g., “T-“, “INV-“).
- Next Number: This is the number that will be used for the next asset of this type that you create. The system automatically increases this number by one each time it’s used.
- Example Next ID: This column shows you a preview of what the next generated ID will look like based on the current settings in the row.
How to Customize an ID Format
- Find the row for the Asset Type you want to change.
- Click into the ID Prefix field and type a new prefix.
- If you need to skip a block of numbers, you can change the Next Number field to a higher value.
- After making your changes, scroll to the bottom of the page and click the main “Save All Preferences” button.
Important: Changes to the ID format only apply to newly created assets. It will not change the IDs of any of your existing assets.