The “Categories” tab in the Settings area gives you a powerful, visual way to organize all of your asset categories.
How to Access the Category Manager
- Navigate to Settings from the main menu.
- Click on the “Categories” tab.
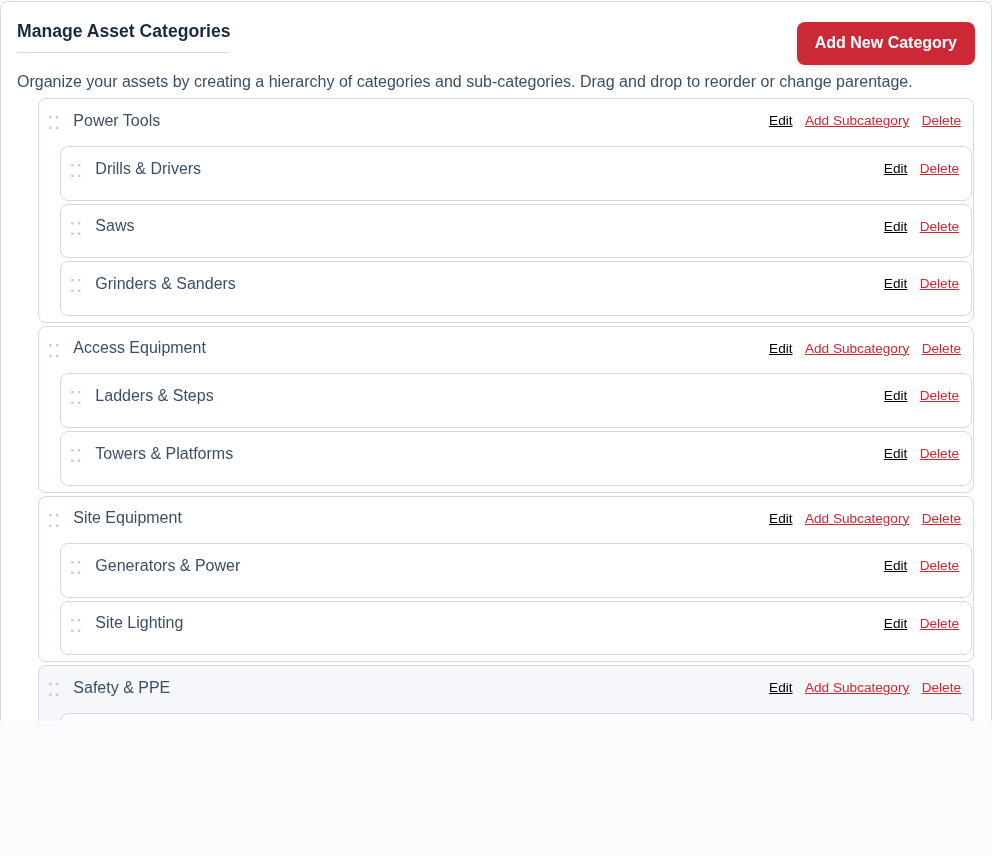
Building Your Hierarchy with Drag and Drop
This interface is fully interactive:
- To Reorder: Click and hold the drag handle (the :: icon) to drag a category up or down within the same level.
- To Create a Sub-category: Drag a category underneath and slightly to the right of another category. The system is limited to a two-level hierarchy (a parent and its children).
- To Make a Sub-category a Parent: Drag a sub-category out from under its parent and into the top-level list.
Changes to the order and parentage are saved automatically when you finish dragging.
Managing Individual Categories
Each category in the list has its own set of actions:
- Edit: Click this to rename the category.
- Add Subcategory: This button appears only on top-level categories. Click it to create a new sub-category directly inside it.
- Delete: Click this to permanently delete the category. Warning: If you delete a category, any assets inside it will become uncategorized. If you delete a parent category, its children will become top-level categories.
Best Practice: A well-organized category tree is one of the most effective ways to keep a large inventory manageable. Take some time to plan a structure that makes sense for your business before you start adding a large number of assets.