
Asset Giant lets you shape the Add/Edit Asset page around the way you work. Every card — Financials, Assignment, Bookings and the rest — can be opened, closed, hidden or moved, on a laptop or a phone. Set it up once and it stays that way, however you’re checking an asset next.
Opening and closing a card
Every card title is a button. Tap or click it to open or close that card — the arrow on the right shows which way it’s pointing.

A closed card isn’t empty. It carries a short summary straight after its title, so you can see what matters without opening it — a price and a purchase date on Financials, a location and a name on Assignment, a photo count on Media. Close every card and the whole asset reads in a handful of lines, at a glance.
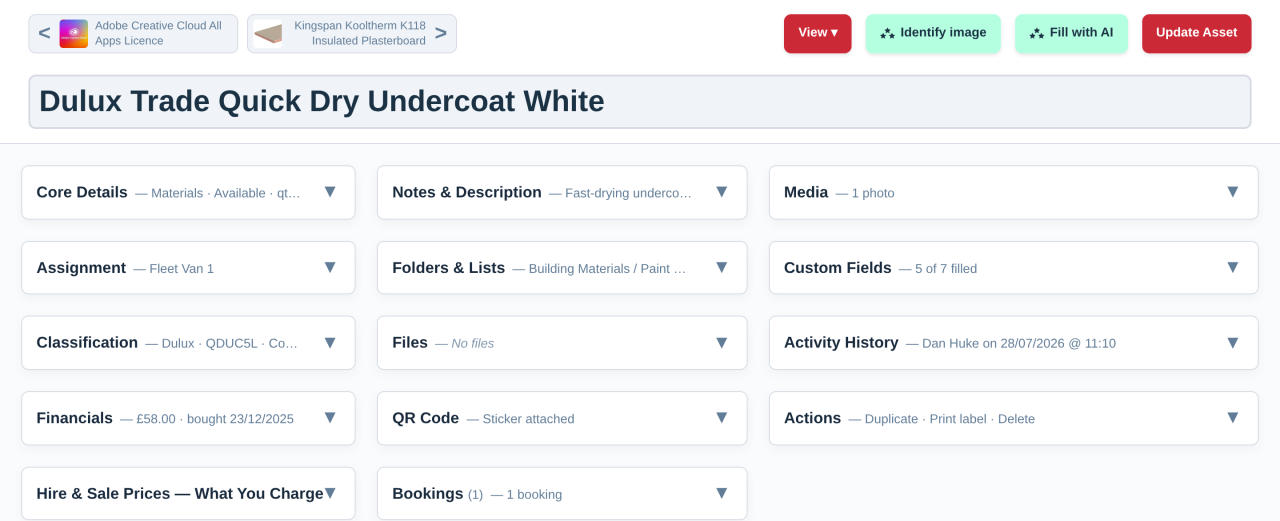
The View menu
View ▾, in the page header on both desktop and phone, does the heavy lifting:
- Expand all — opens every card in one tap.
- Collapse all — closes every card down to its summary line.
- Customise view… — opens the arranging mode described below.
- Reset to default layout — puts this device’s layout back to how it started.

Hiding and reordering cards
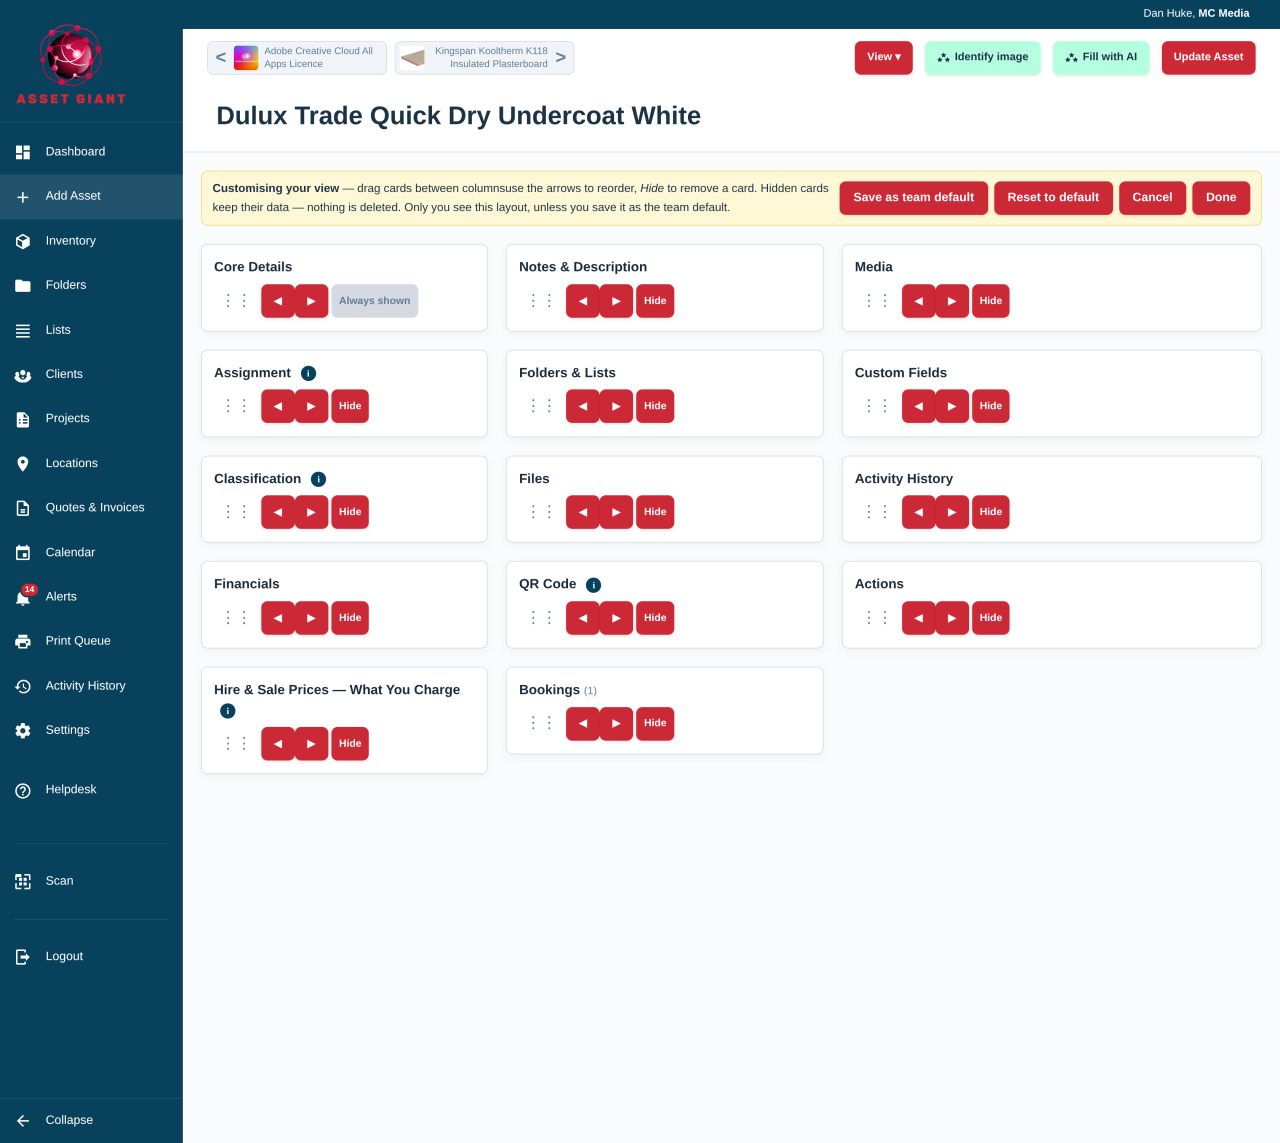
Choose Customise view… to rearrange the page itself. Every card shows its controls:
- On a laptop or desktop, drag a card by its handle to move it, or use the ◀ ▶ buttons to send it to the next column.
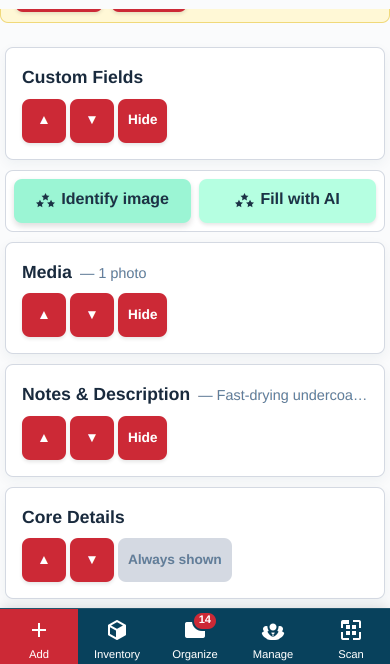
- On a phone, use ▲ ▼ to move a card up or down the list.
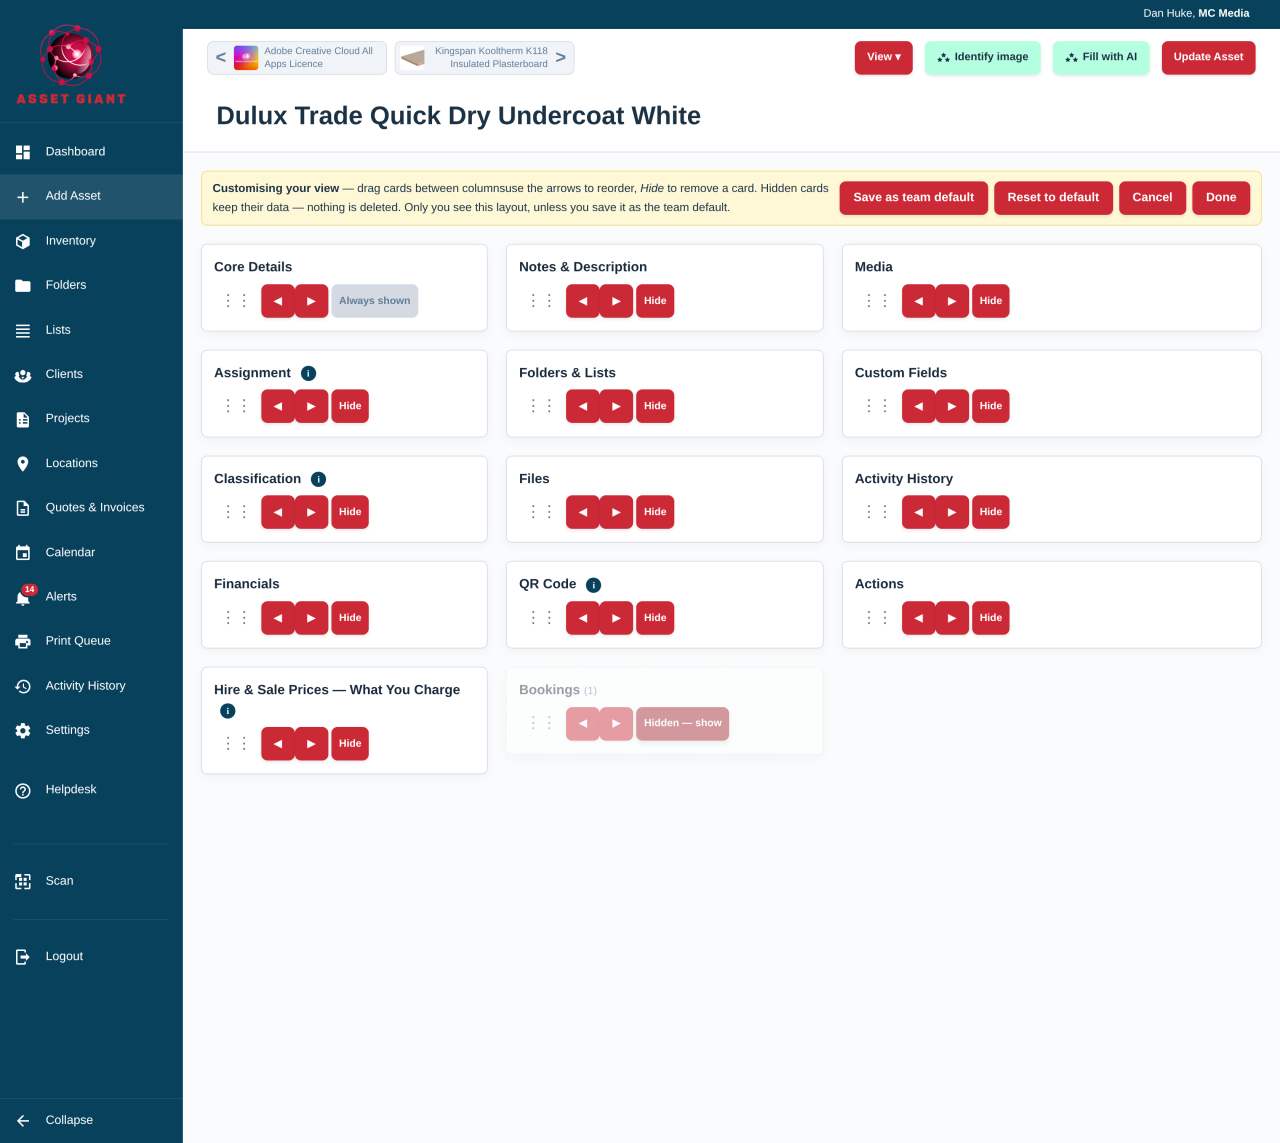
- Hide removes a card from the page without touching its data — nothing is deleted, and hiding a card is never destructive. Core Details is always shown, since it holds the asset’s name, type and status.
A hidden card sits greyed out where it was, with a Hidden — show button, so bringing it back is one click away.
On a phone, the same controls appear as a stacked list with ▲ ▼ arrows in place of drag handles.
Once you’re happy, press Done to save the layout, or Cancel to leave everything as it was. If you have permission to manage company settings, you’ll also see Save as team default — this sets the starting layout for anyone on your team who hasn’t arranged their own yet.
Nothing you hide is ever lost. A hidden card’s information stays attached to the asset — it’s simply out of the way until you show it again.
It remembers, for you, on this device
Your layout is saved per person and per device shape — your desktop arrangement and your phone arrangement are independent, and both stay exactly as you left them the next time you sign in, on any computer or phone. If something needs your attention — an error on saving, or a field the AI has just filled in — Asset Giant will open a hidden or collapsed card automatically so you never miss it.
To put a layout back to how it started, choose Reset to default layout from the View menu, or go to Settings → Personal Profile, where a Reset both to default button clears your desktop and phone layouts together.
Reordering your Custom Fields
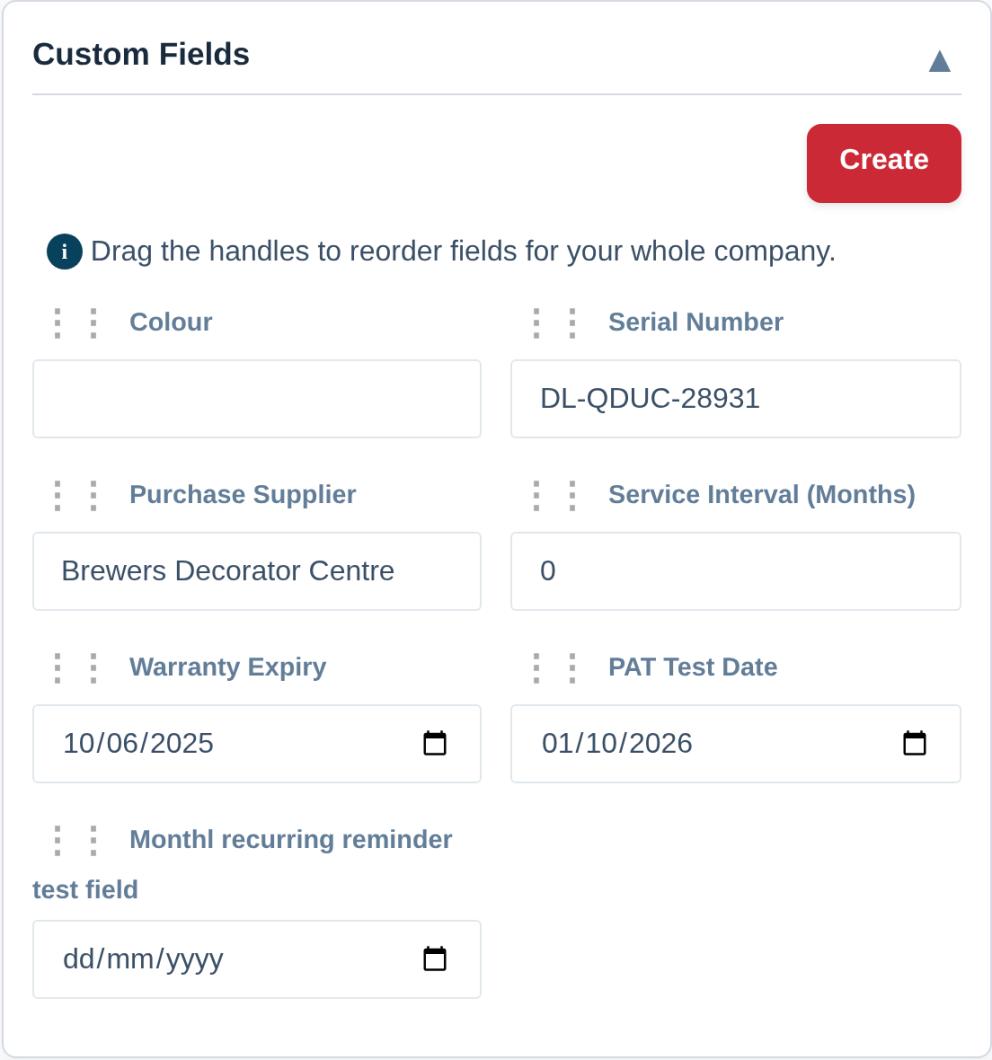
If you have permission to manage company settings, the Custom Fields card carries the same drag handles you’ll find in Settings → Custom Fields. Dragging a field into a new position changes the order for everyone in your company — on every asset, and in exports and the spreadsheet template — so it’s worth agreeing the order with your team first.
For the full walkthrough of creating and reordering custom fields, see Add Your Own Fields to Track Anything Extra. See also Customise Your Asset Page (feature overview) for why this is worth setting up the way your business actually works.