“Locations” are a fundamental part of Asset Giant. Every asset can be assigned to a location, giving you a real-time overview of where your equipment is.
Finding the Locations Page
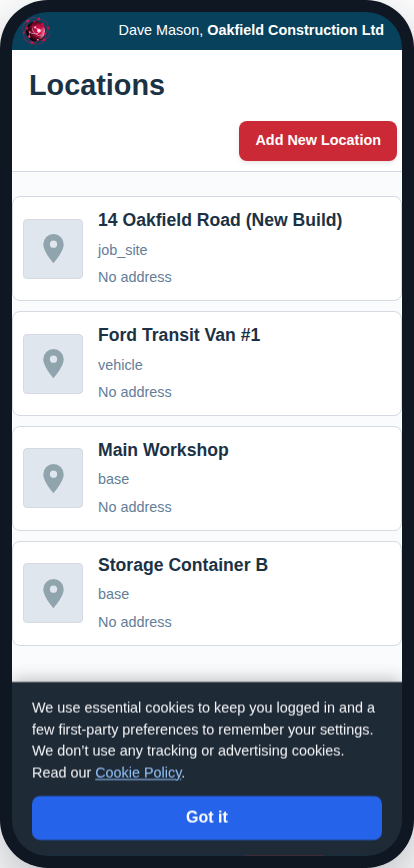
You can view your list of all created locations by navigating from the main menu to Manage -> Locations.
Choosing a Location Type
When you create a location, you choose a type. This helps with organization and future features. There are three to pick from:
- Base: Choose this for a fixed home base such as your main office, a lockup, a workshop, or a storage unit.
- Vehicle: Choose this for any mobile location. This is ideal for company vans, trucks, or trailers.
- Job Site: Choose this for a customer’s premises or a construction site where work is being carried out.
Creating a New Location
- From the Locations Viewer page, click the “Add New Location” button in the header.
- On the “Add/Edit Location” page, fill in the details:
- Location Name: A clear, descriptive name (e.g., “Unit 14 Workshop”, “Ford Transit – Reg BX68 YZM”).
- Location Type: Choose Base, Vehicle, or Job Site.
- Address: For a fixed base or job site, you can enter the physical address.
- Notes: Add any special instructions for the team, such as “Key stored in lockbox, code 1234”.
- Photo: Uploading a photo can help your team quickly identify a location.
- Click “Save Location”.
Viewing Assets at a Location
When editing an existing location, a card will appear at the bottom of the page titled “Assets at This Location.”

This embedded inventory viewer shows you every item currently assigned to that location. This is the quickest way to see, for example, exactly what tools and materials are currently in “Van #2”. From here, you can use bulk actions like “Check Out / Move…” to transfer all selected items to another location in a single step.