Now that you’ve set up your account, it’s time for the most important step: adding your first item to the inventory. There are two ways to do this: using the AI to identify the item from a photo (recommended) or entering the details manually.
Method 1: Using the AI (Recommended)
This is the fastest and easiest way to get started.
1. Prepare Your Asset
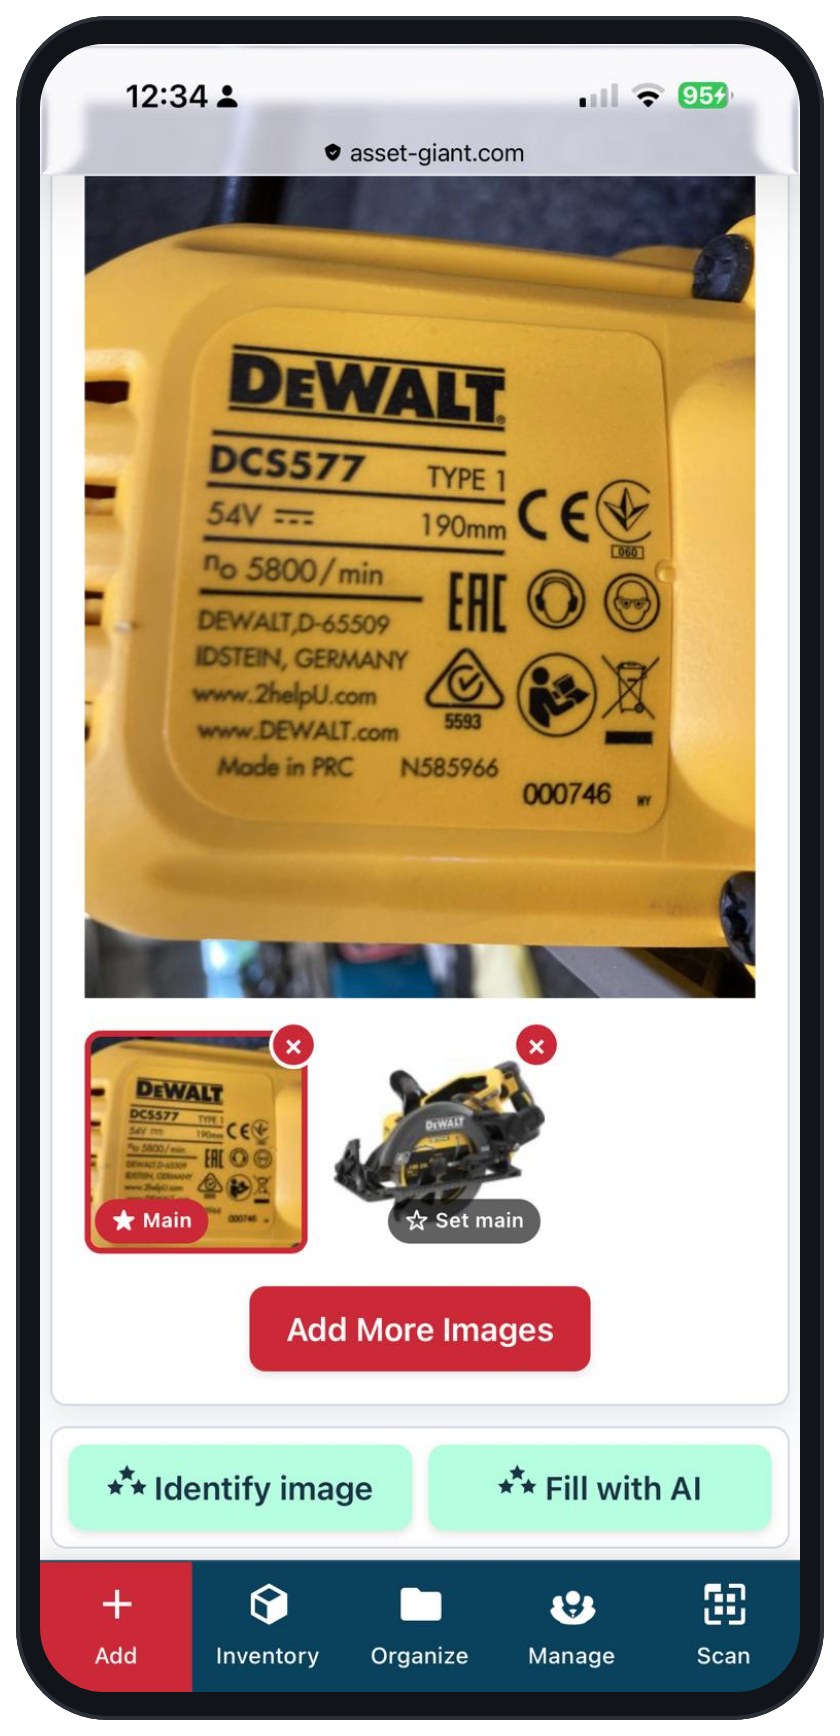
Grab the tool or item you want to add and place it in a well-lit area with a simple background. Take one or more photos. If available, include a close up of identifying text, such the model name / number, serial number, etc. The AI is most likely to identify your item correctly if you give it a few different photos, but even one photo sometimes works just fine.
2. Navigate to the “Add Asset” Page
Click the “Add Asset” button in the main navigation menu (the large “+” button on mobile).
3. Upload a Photo
In the Media card, click the “Add” button and select at least one photo of your asset (ideally 3-5). For best results, make sure the brand name and model number are visible.
4. Select the Asset Type
In the Core Details card, select the appropriate Asset Type (e.g., “Tool”). This is required before the AI can run.
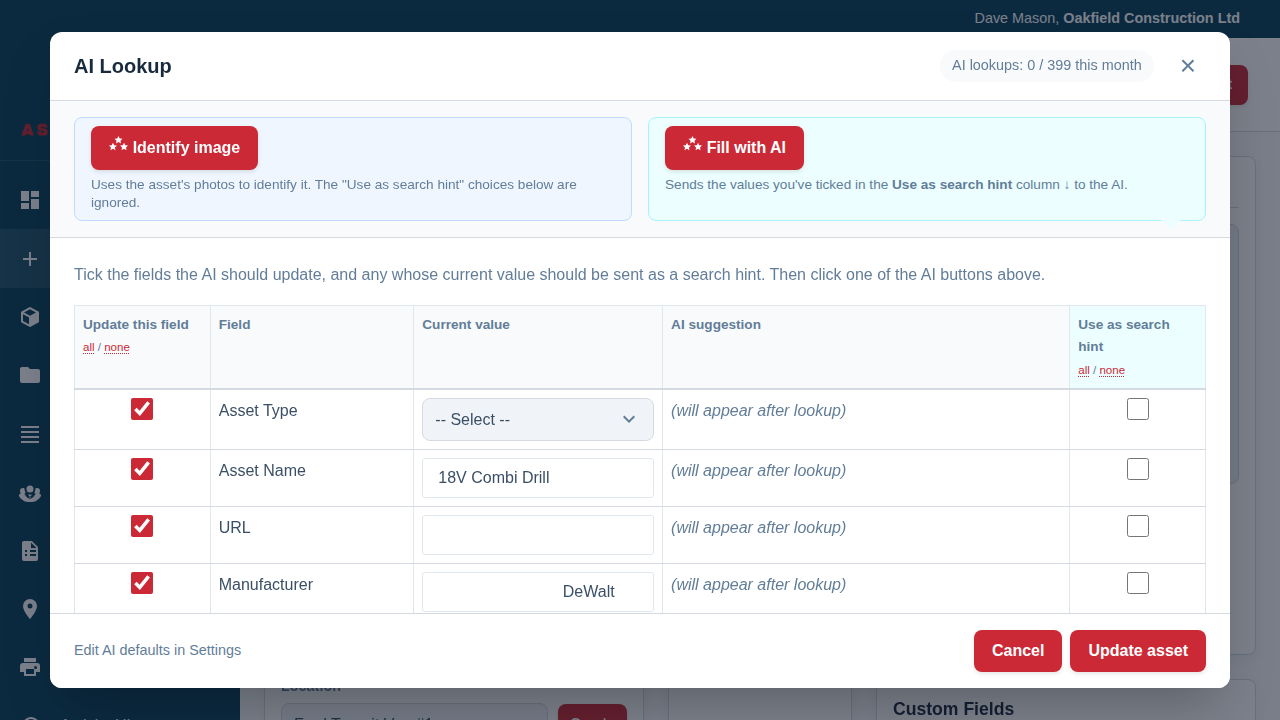
5. Click the “Identify image” Button
In the header, the “Identify image” button will now be active. Click it. The system will analyse the photos and automatically fill in the details it recognises, such as the name, manufacturer, and category.
6. Review, Assign a Location, and Save
The AI-filled fields will be highlighted in yellow. Check them for accuracy, and most importantly, assign the asset to a Location in the “Assignment” card. Once you’re happy, click “Save Asset” in the header.
Method 2: Adding an Asset Manually
If you don’t have a photo or prefer to enter the data yourself, you can always add an asset manually.
- Navigate to the “Add Asset” page.
- Start by filling in the fields in the Core Details, Classification, and Assignment cards.
- Add any other relevant information, such as purchase price or notes.
- Click “Save Asset”.
For a more detailed guide on this method, please see The Add/Edit Asset Page: An Overview.
That’s it! You’ve successfully added your first asset. Repeat the process for your other items to build out your complete inventory.