Bulk actions allow you to modify many assets at the same time, saving you from having to edit them one-by-one. The bulk action controls appear at the top of the inventory list as soon as you select your first item.
How to Use Bulk Actions
1. Select Your Assets
Use the checkboxes on the left side of the inventory list (in either desktop or mobile view) to select the assets you want to modify.
- You can use the “Select All” and “None” links in the bulk actions bar to quickly select or deselect all visible items.
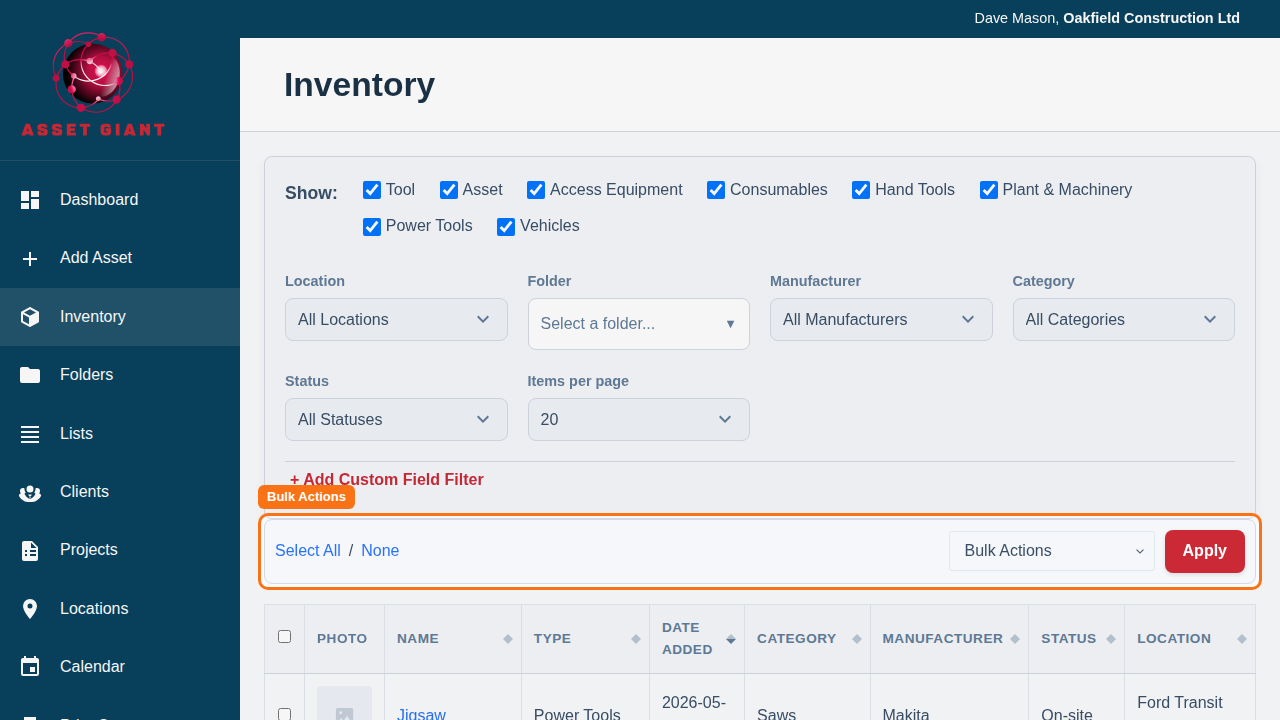
2. Choose an Action
From the “Bulk Actions” dropdown menu, choose the action you want to perform. Common actions include:
- Edit…: Opens a window where you can change shared field values — status, asset type, category, location, project, assignments and your own custom fields — across every selected asset at once. See the section below.
- Export…: Opens a modal to export the selected items to CSV or PDF.
- Move to Folder…: Allows you to move all selected items into a single folder.
- Add to List…: Lets you add all selected items to an existing list or a new one.
- Delete (Move to Trash): Moves all selected items to the trash.
3. Apply the Action
Click the “Apply” button. Depending on the action you chose, you may be asked to confirm or provide more information in a popup modal.
Example: Moving Items to a Folder
- Check the boxes next to three power tools.
- Select “Move to Folder…” from the dropdown and click “Apply”.
- A modal will appear showing your folder structure.
- Click on the “Power Tools” folder and click “Move Items”.
- All three tools will be moved into that folder at once.
Editing Field Values in Bulk
The Edit… action is the most powerful of the bulk actions: instead of moving or listing your assets, it changes the information *on* them. It’s ideal for jobs like marking a whole batch of returned tools as “Available”, moving a van’s worth of kit to a new location, or assigning a group of items to the same project — all in one go.
1. Select your assets and choose “Edit…”
Tick the assets you want to change, choose “Edit…” from the Bulk Actions dropdown, and click “Apply”. A full-screen editing window opens.
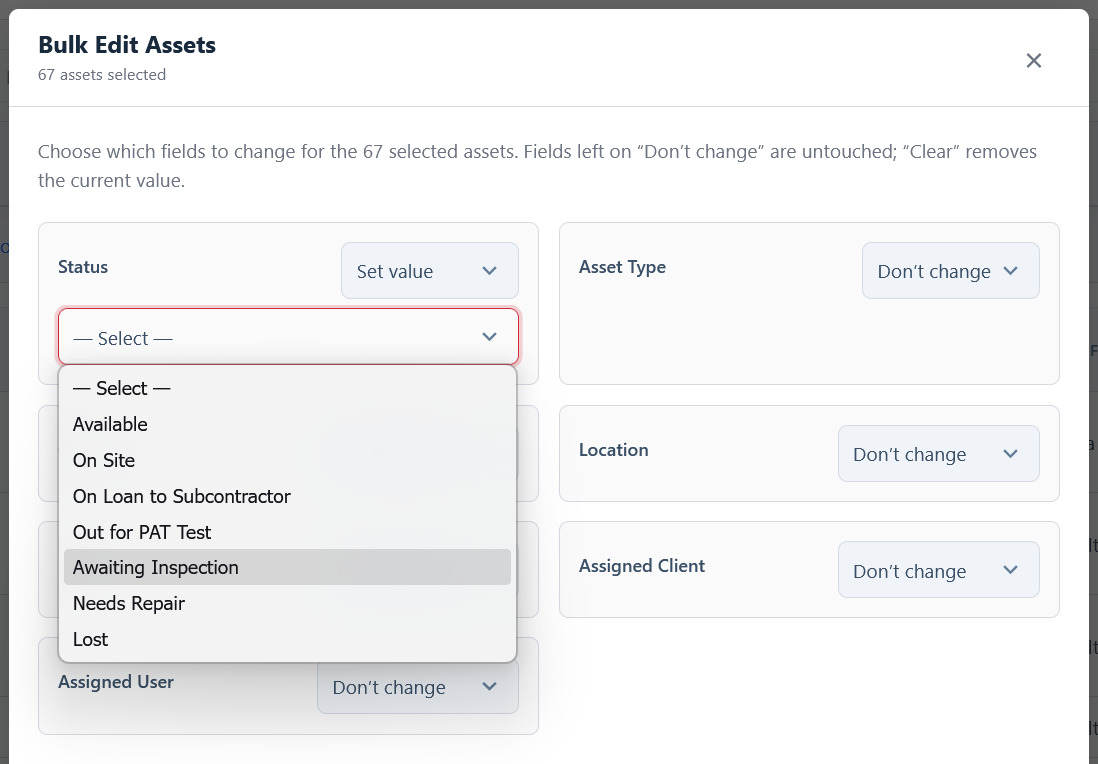
2. Decide what to change
Every field starts on “Don’t change”, so nothing is touched until you say so. For each field you want to update, switch its dropdown to:
- Set value — then choose or type the new value. You can update Status, Asset Type, Category (and subcategory), Location, Project, Assigned Client, Assigned User, and any of your company’s custom fields.
- Clear / Unassign — empties that field on every selected asset. This is available for assignments (location, project, client, user) and optional custom fields. Status and Asset Type can’t be cleared because every asset must have them.
Fields left on “Don’t change” keep their existing values, so two assets with different locations can both have their status updated without disturbing anything else.
3. Review and confirm
Click “Review changes →”. A summary shows exactly what will happen — for example, *”21 assets will be updated as follows: Status → Available, Location → Main Yard”*. Check it, then click “Apply changes”.
4. Done
A confirmation message tells you how many assets were updated. Every change is recorded in each asset’s Activity History — for example, *”Status was changed from ‘On Site’ to ‘Available’ by Jane Smith using the bulk edit tool.”* — so there’s always a clear record of what was changed, by whom, and when. To learn more about that audit trail, see Card Focus: Activity History.