The QR Scanner is the heart of Asset Giant’s mobile experience. Instead of typing names or searching through tables, you can use your device’s camera to interact with your physical assets and locations in real-time.
How to Access the Scanner
You can open the scanner from any page within the application:
- On Desktop: Click the Scan button in the navigation sidebar, located between Settings and Logout.
- On Mobile: Open the Manage menu in the bottom navigation bar and select Scan at the very top of the list.
Choosing the Right Mode
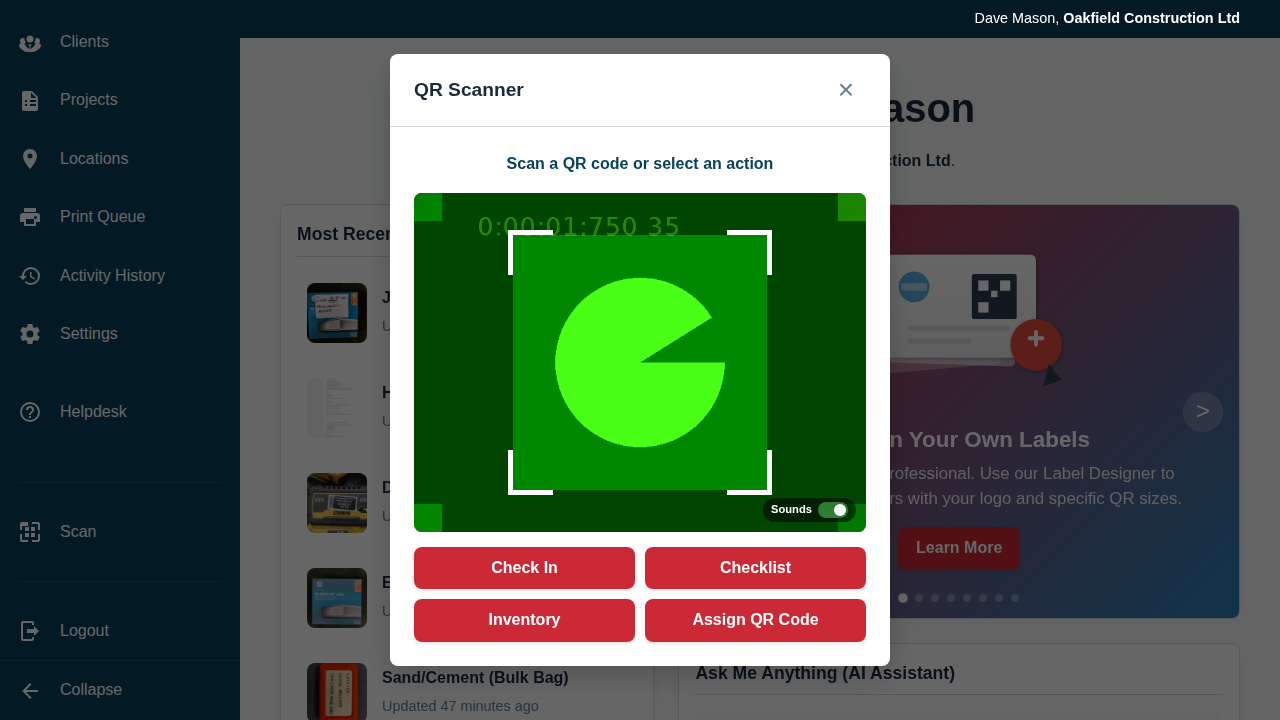
When the scanner opens it starts in its default mode: just point the camera at any asset or location QR code, and the system recognises it and shows a summary card with quick actions like Check In, Stocktake, or Edit. This is all you need for quickly identifying an item.
For more structured jobs, four action buttons sit below the camera. Tapping one tells the system what you’re trying to achieve:
- Check In: Use this when you are moving equipment between locations, such as a job site or a vehicle. You pick the location first, then scan the items.
- Checklist: Use this to work through one of your saved lists and verify that all the required items for a specific job or kit are present and accounted for.
- Stocktake: Use this to take stock of a specific location, scanning what’s actually there so you can see what’s present and what might be missing.
- Assign QR Code: Use this to take a freshly printed, unassigned sticker and link it to an existing item in your inventory.
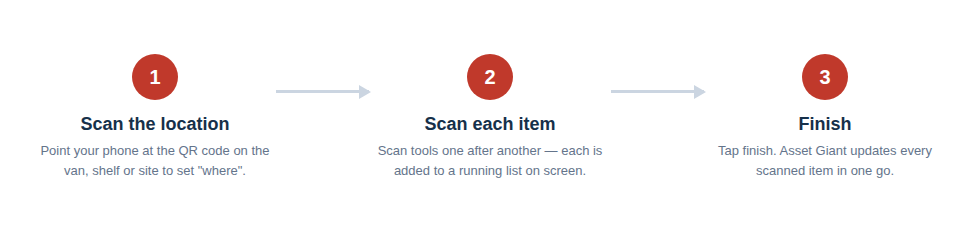
For the location-based modes (Check In and Stocktake), the flow is always the same three simple steps:
Intelligent Recognition
The scanner is “smart” and will behave differently based on what it sees:
- Assets: Shows a thumbnail image, the Asset ID, and current status.
- Locations: Shows the location name and offers to run a stocktake there or check items in and out.
- Unassigned Codes: If you scan a brand-new sticker that hasn’t been used yet, the system will offer to help you create a new asset or assign it to an existing one.
Best Practice: Ensure your camera lens is clean and you have adequate lighting. If a code is small or damaged, try moving the camera closer or further away until it clicks into focus.
Feedback and History
Every time you perform a successful action through the scanner (like checking an item in), the device will provide a short vibration pulse to let you know the scan was successful. Additionally, every scan is recorded in your Activity History, allowing you to see exactly who scanned what, and when.
Using the Mobile Scanner to Check Items In/Out
Performing an Inventory Stocktake