Checklists are powerful tools for ensuring nothing gets left behind. Whether you are loading a van for a kitchen installation or verifying a safety kit, the Checklist scanner provides a visual, real-time way to verify your gear.
Starting a Checklist
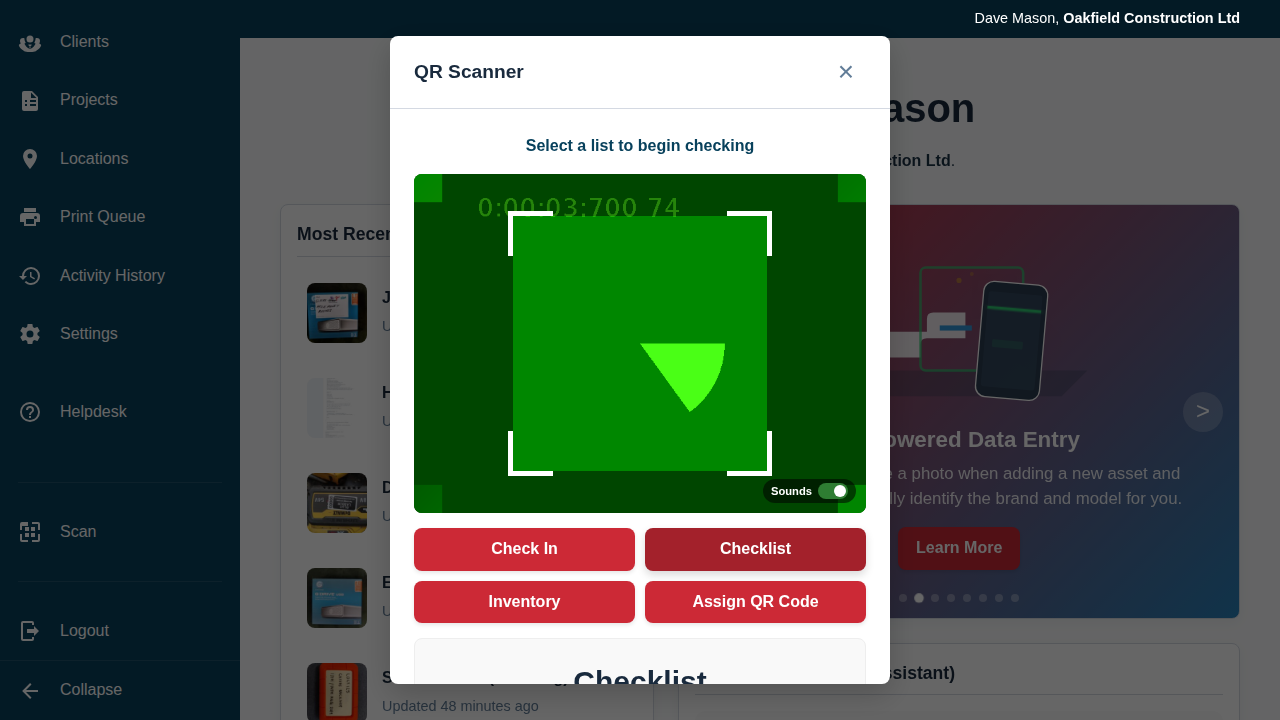
- Open the QR Scanner and click the Checklist button.
- Select the List you want to use (e.g., “Installation Tools”) from the dropdown menu.
- Click Start Checklist.
Scanning and Progress
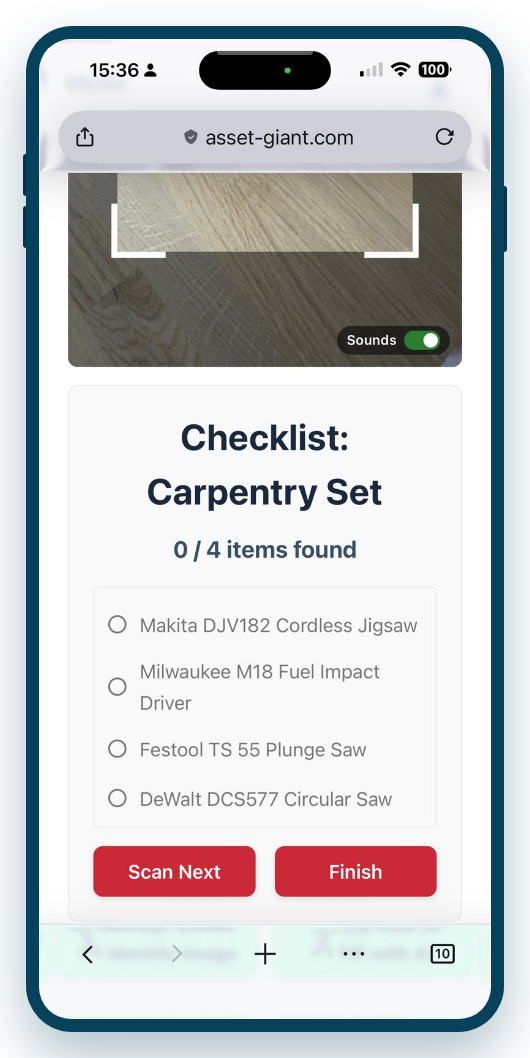
Once started, the camera opens and shows your checklist progress at the top (e.g., “0 / 12 items found”).
- Point the camera at an asset’s QR code.
- If the item is on your list, it will turn green with a ✅ checkbox and a strikethrough in the list below the camera.
- The “items found” counter will update immediately.
- If you scan an item that is not on the checklist, a red notification will appear to warn you.
Finishing the Session
- Automatic Completion: If you scan every item on the list, the system will automatically pop up a confirmation to save the record.
- Manual Finish: If you cannot find everything, you can click Finish at any time to save an “Incomplete” record.
Reviewing Results
Every time a checklist is completed, a permanent Checklist Record is created.
- Go to the Manage List page for that specific list.
- Scroll down to the Checklist History card.
- You can see exactly who performed the check, when they did it, and how many items were found (e.g., 10 / 12).
Best Practice: Create “Standard Loadout” lists for your different types of jobs. This allows employees to quickly self-audit their vehicles before leaving the warehouse.