
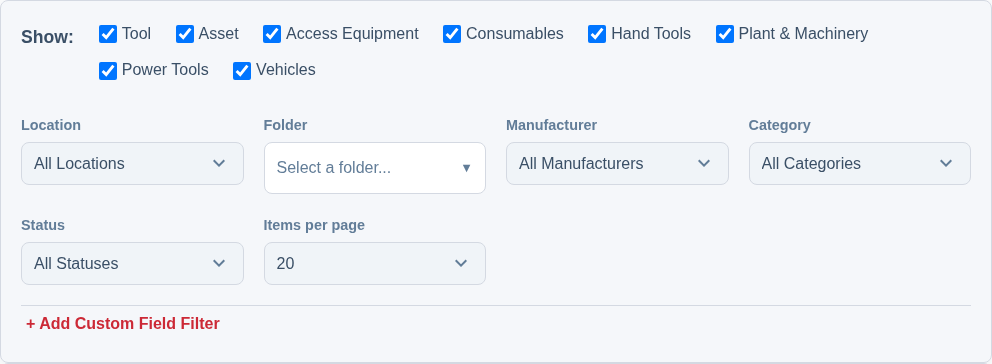
The Inventory Viewer is designed to help you find exactly what you’re looking for, even in a large inventory. The filter bar at the top of the page provides several ways to narrow down your asset list.
Standard Filters
These dropdowns and checkboxes cover the most common ways to filter your items:
- Show (Asset Types): Use these checkboxes to show or hide broad types of assets. For example, uncheck “Tool” to see only your consumable “Assets”.
- Location: Filter down to only show assets assigned to a specific workshop, vehicle, or job site.
- Folder: If you use folders to organize your inventory, this component allows you to select a folder (and all its sub-folders) to view its contents.
- Manufacturer: Show only items made by a specific brand (e.g., “Honda”).
- Category: Select a category to see all items within it (e.g., show all “Generators”).
- Status: Find all assets with a specific status, such as “Needs Repair” or “On-Site”.
- Due within: Show only the items with a date coming up — Overdue, Today, the next 7, 14, 30, 60 or 90 days, 6 months or 12 months. A second dropdown appears beside it so you can say which date you mean: All due dates, Warranty expiry, Due back, Maintenance or testing, or any date custom field you track. Choosing Maintenance or testing and Next 30 days gives you the month’s testing round in two taps, on any plan (see Setting Up Maintenance and Test Schedules).
You can use any combination of these filters at the same time. The list will update automatically as you make your selections.
Custom Field Filters
For even more powerful searching, you can filter by the custom fields you have created.
1. Add a Filter Rule
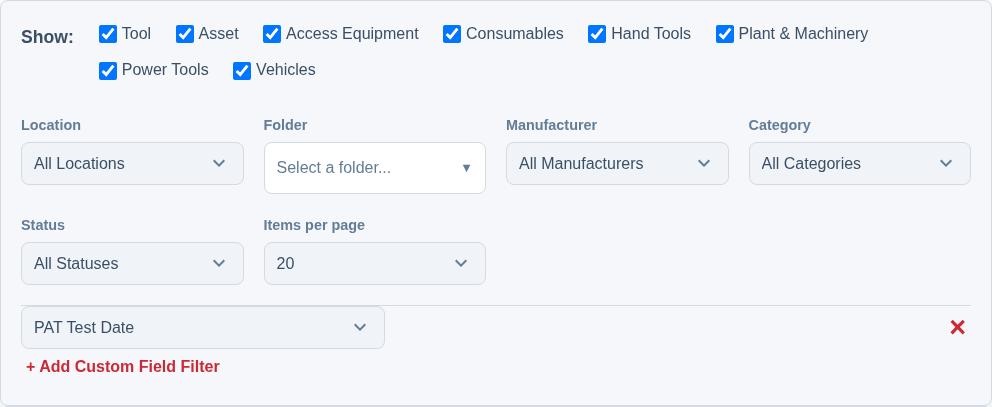
Click the “+ Add Custom Field Filter” button. A new row will appear with three inputs.
2. Build Your Rule
- First dropdown: Select the custom field you want to filter by (e.g., “Next Service Date”).
- Second dropdown (Operator): Choose how you want to compare the value (e.g., “is before”, “is equal to”, “contains”).
- Third input (Value): Enter or select the value you want to search for.
The operators and the value box follow the field’s type. A date field offers is before and is after and gives you a date picker; a field that is a list of options offers is and is not, with your own options as a dropdown to pick from.
Example:
To find all assets that need servicing before the end of the year, you could build a rule that reads: Next Service Date → is before → 2026-12-31.
You can add multiple custom field rules to create highly specific and powerful searches. To remove a rule, simply click the ‘X’ button at the end of its row.