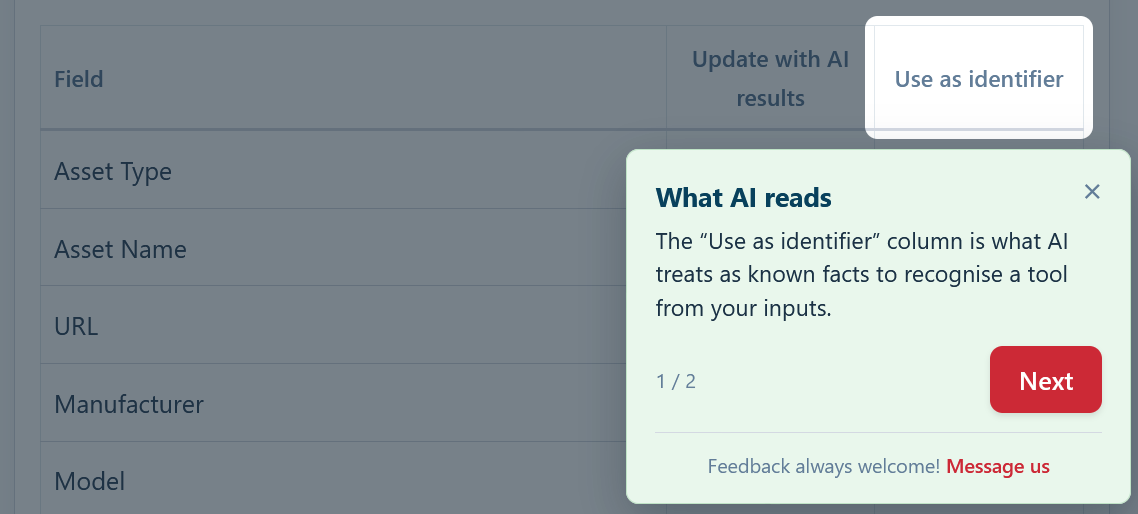
When you first start using Asset Giant there’s a lot you can do, and it isn’t always obvious where the most useful features are hiding. Guided tours solve that. A tour is a short sequence of small pop-up tips that highlight a part of the screen and explain what it does — for example, the AI button that identifies a tool from a photo, or the button that books a whole kit onto the calendar for a project.
Each tour has just two to four tips. A tip box points at one thing, you read it, and you move on with Next — or close it at any time. Tours are completely free on every plan, including the Free Forever tier.
When tours appear on their own
If automatic tips are switched on (they are by default), a tour appears the first time a particular page or feature is genuinely useful to you. Open the booking calendar for the first time and you’ll get a quick tour of how to reserve an asset or a kit; open the label designer and you’ll see how to choose what prints on your stickers. You’ll only ever see each one automatically once, with the occasional gentle reminder about a feature you might not have tried yet. Tours never stack up — you’ll only see one at a time, and never while you’re in the middle of something like a pop-up window.
Running a tour whenever you like
You don’t have to wait for a tour to appear. There are three easy ways to run one on demand.
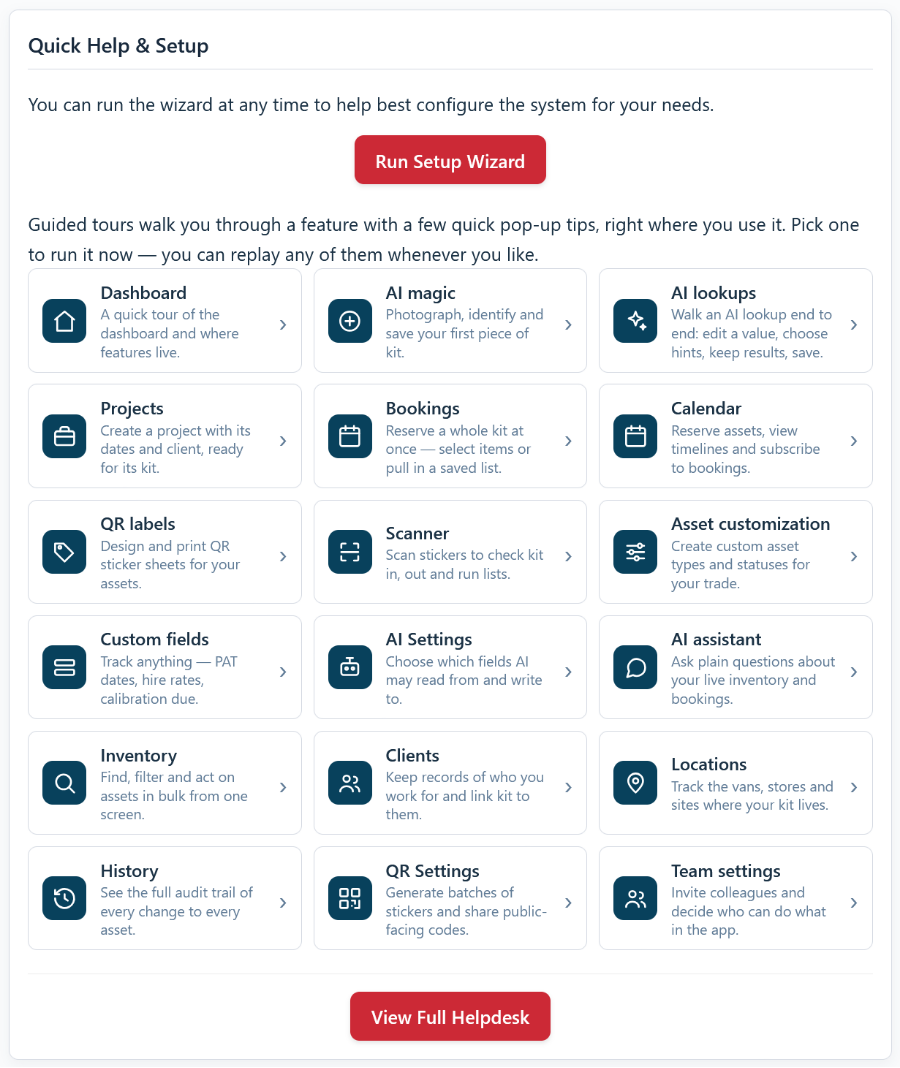
1. From the dashboard. On your main Dashboard, the Quick Help & Setup card lists every guided tour, each with an icon and a short description like “Plan bookings on the calendar” or “Design and print QR labels”. Tap one and Asset Giant takes you to the right place and runs that tour.
2. “Show tips for this page”. Open the user menu in the top-right corner (your name and company) and choose “Show tips for this page”. This replays whatever tours belong to the page you’re currently on — handy when you’re already deep in a feature and want a refresher. If a page doesn’t have any tours, you’ll see a short message letting you know.
3. They’re always repeatable. Replaying a tour never “uses it up” — run any tour as many times as you like, which is perfect when you’re showing the system to someone else.
Turning automatic tips off (or on)
Some people love the prompts; others would rather explore in peace. You’re in control:
- Go to Settings and open the Personal tab.
- Find the Helpful tips setting.
- Untick “Show me guided tips automatically as I use the app” to stop them popping up by themselves.
Switching this off only stops tours appearing *automatically* — you can still run any of them whenever you want from the dashboard list or the “Show tips for this page” menu item. Your choice is saved to your own account, so it follows you between your phone on site and the computer back at the office, and it doesn’t affect anyone else on your team.
A helping hand for new team members
Because every user has their own tips, guided tours are a quick, no-cost way to get a new member of staff up to speed. When someone joins your team and logs in for the first time, the tours introduce the features they’ll use most without you having to sit beside them. For more on adding people, see Managing Your Team Members and Roles.
If you’d still like a hand after exploring the tours, see How to Get Help and Support.