
Asset Giant turns any list into a blank tick sheet you can print, hand over and fill in with a pen. Every item gets a tick box and a row, the sheet carries your company name and logo, and there are lines at the top for the job and the person and a signature line at the bottom. It is the sheet that goes out in the van — useful in a basement with no signal, on a site that bans phones, or when a sub-contractor wants paper.
This is different from the report you get after checking a list off by scanning, which records what was actually found (see Managing Assets with Digital Checklists). This one goes out empty.
Printing one
- Open the list from Organize then Lists and click its name to reach the Manage List page.
- Open the Actions menu and choose Print Checklist….
- Choose the columns you want on the sheet.
- Press the Print Checklist button. A PDF is produced, ready to print or email.
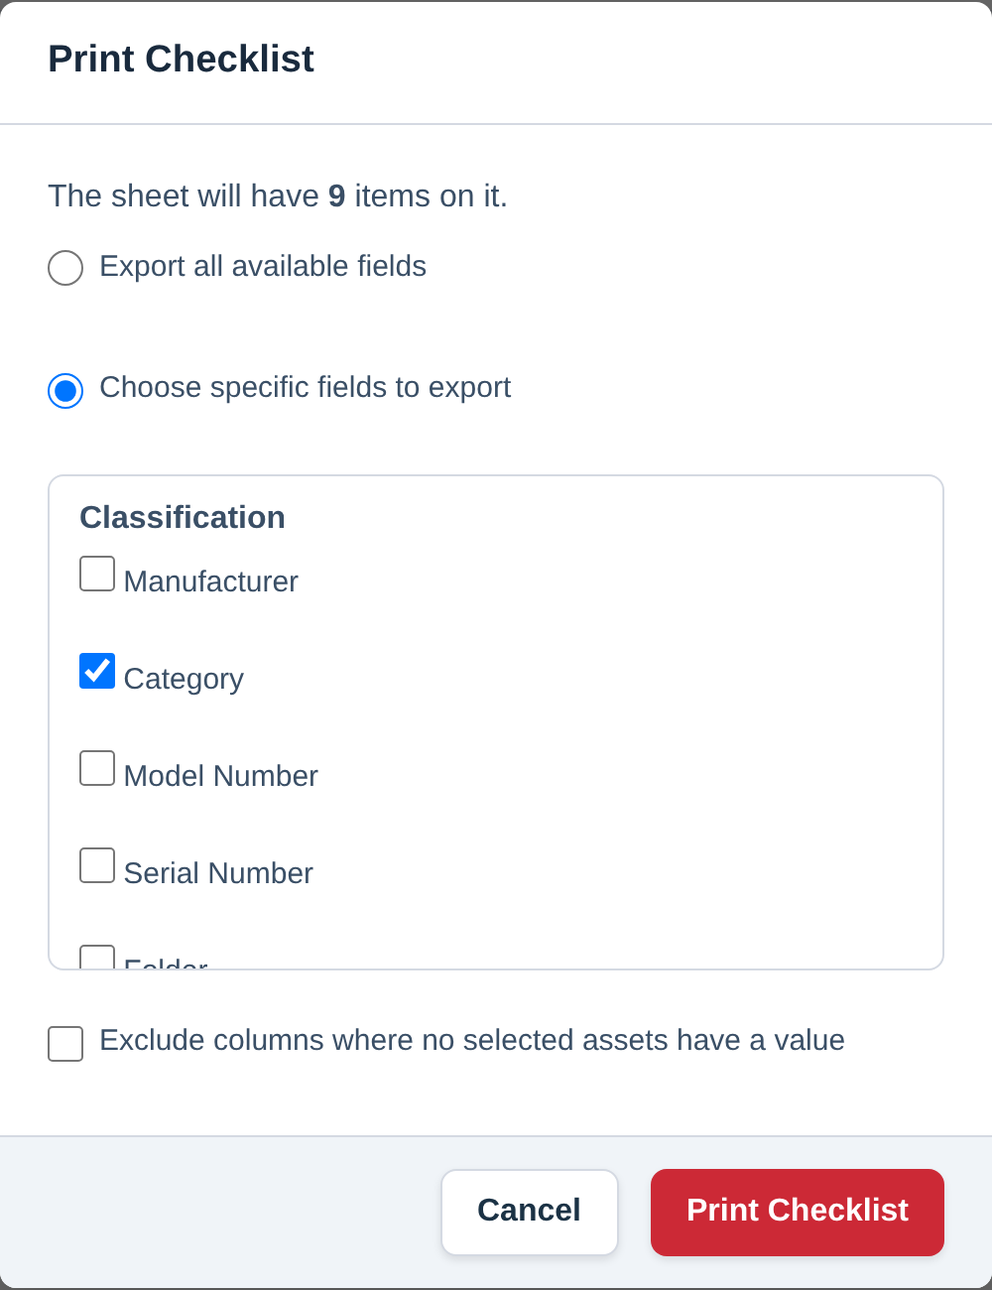
Choosing the columns
A tick box and the item’s name are always on the sheet. Everything else is up to you, chosen from the same field picker the other exports use, so anything you can export you can print:
- Asset ID is ticked to start with — it is what somebody writes down or reads back.
- Category, Location, Manufacturer, Model Number or Serial Number help the person tell two similar items apart.
- Image (PDF only) puts a small photo beside each row, which is the quickest way for somebody new to the kit to know what they are looking for.
- Custom fields of your own appear in the list too.
Keep it to a handful on a sheet that is going out on a clipboard: four columns and a photo read well at arm’s length, and a dozen do not.
What the printed sheet looks like
- Your company name and logo across the top, with Printable Checklist underneath (see Setting Up Your Company Profile).
- The list name and the print date, so two sheets never get confused.
- Job/Project and Person lines — filled in if the list is already attached to a project or a person, and left as blank write-on lines if not.
- Signed and Date lines, for the hand-over.
- The list’s description, if it has one, so instructions written once travel with every printed copy.
- One row per item, in your list’s own order, with its section headings kept.
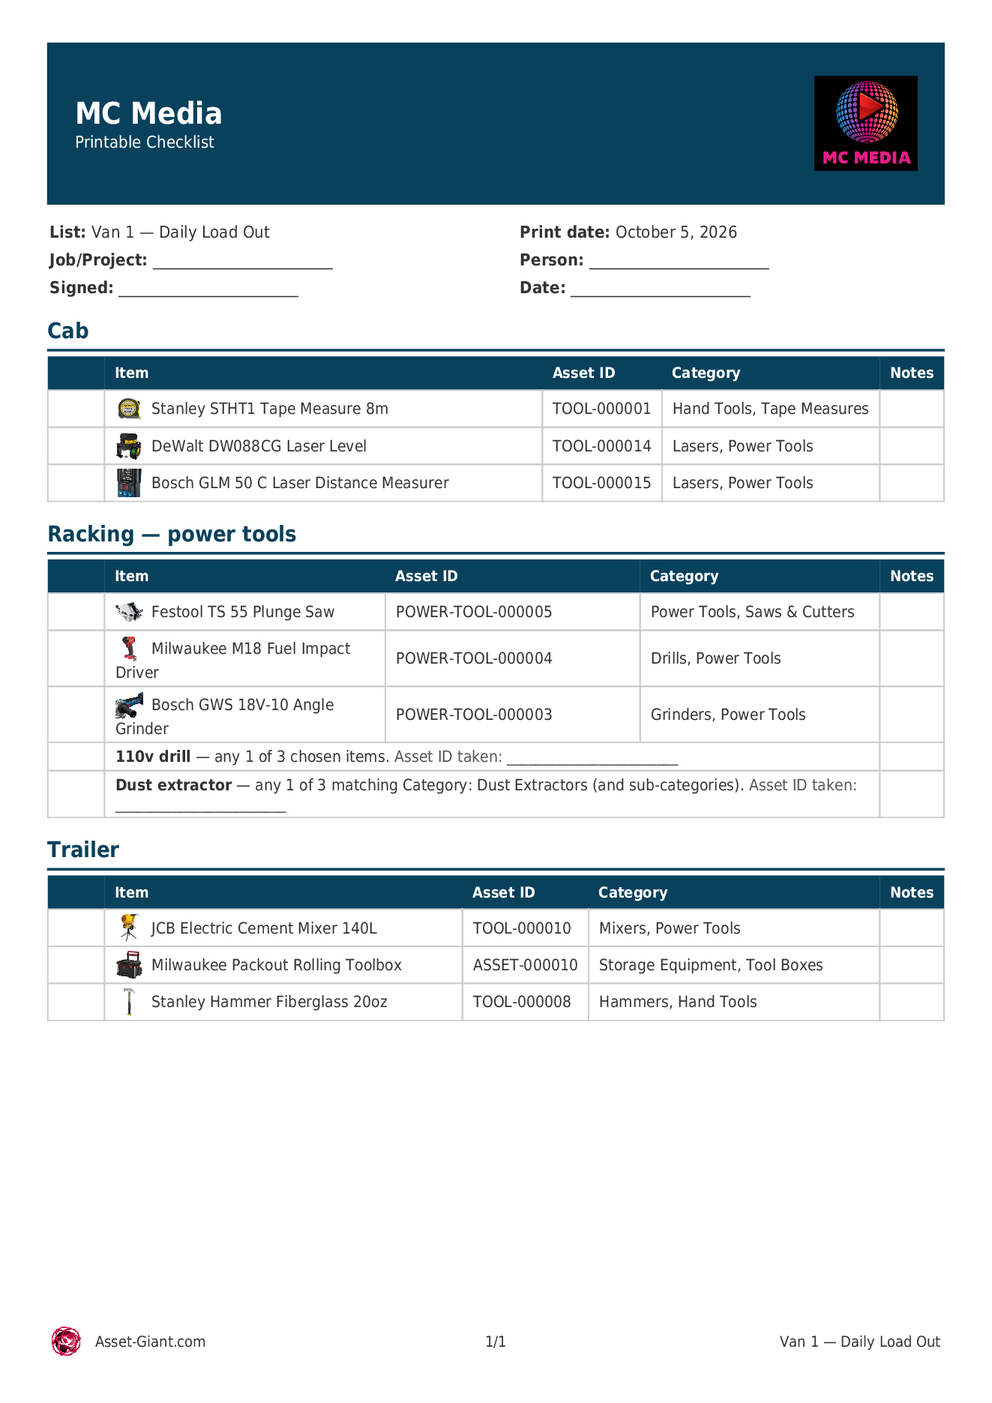
Substitute lines on a printed sheet
A substitute line — “any one of these” — prints as a single row: the line’s name in bold, then what satisfies it (“any 1 of 3 chosen items”), then a write-on line for Asset ID taken. The person loading the van decides which one goes and writes down the one they took, which is exactly the job paper is better at than a dropdown (see Adding Substitute Items to a List).
Tips
- Print it in your list’s order. Reorder the list so the sheet reads in the order the van is loaded, and the walk round the yard becomes top to bottom (see Put a Kit List in the Order You Pack It).
- Use section headings for van, cab and trailer. They print as headings, so a long sheet stays readable.
- Keep the signed sheet. Scan or photograph it and attach it to the project or to one of the assets as a file, and the paper trail joins the digital one (see Keep Receipts, Manuals and Certificates with the Asset).
- A very long list makes a large PDF. If a sheet is slow to produce, print it with fewer columns and no photos.
For checking kit off in the app instead, see Managing Assets with Digital Checklists and Digital Checklists (feature overview).